教程 5 - 移动化:安卓
现在,我们要将应用程序部署为 Android 应用程序。
将应用程序部署到 Android 的过程与部署为桌面应用程序的过程非常相似。公文包会处理 Android 依赖项的安装,包括 Android SDK、Android 模拟器和 Java 编译器。
创建并编译 Android 应用程序
首先,运行 create 命令。这会下载一个 Android 应用程序模板,并在其中添加您的 Python 代码。
(beeware-venv) $ briefcase create android

[helloworld] Generating application template...
Using app template: https://github.com/beeware/briefcase-android-gradle-template.git, branch v0.3.18
...

[helloworld] Installing support package...
No support package required.

[helloworld] Installing application code...
Installing src/helloworld... done

[helloworld] Installing requirements...
Writing requirements file... done

[helloworld] Installing application resources...
...

[helloworld] Removing unneeded app content...
Removing unneeded app bundle content... done

[helloworld] Created build/helloworld/android/gradle
(beeware-venv) C:\...>briefcase create android

[helloworld] Generating application template...
Using app template: https://github.com/beeware/briefcase-android-gradle-template.git, branch v0.3.18
...

[helloworld] Installing support package...
No support package required.

[helloworld] Installing application code...
Installing src/helloworld... done

[helloworld] Installing requirements...
Writing requirements file... done

[helloworld] Installing application resources...
...

[helloworld] Removing unneeded app content...
Removing unneeded app bundle content... done

[helloworld] Created build\helloworld\android\gradle
首次运行 briefcase create android 时,Briefcase 会下载 Java JDK 和 Android SDK。文件大小和下载时间可能相当长;这可能需要一段时间(10 分钟或更长,取决于您的互联网连接速度)。下载完成后,系统将提示您接受 Google 的 Android SDK 许可证。
完成后,我们的项目中就会有一个``build/helloworld/android/gradle``目录,其中包含一个带有 Gradle 构建配置的 Android 项目。这个项目将包含你的应用代码,以及一个包含 Python 解释器的支持包。
然后,我们可以使用 Briefcase 的 build 命令将其编译为 Android APK 应用程序文件。
(beeware-venv) $ briefcase build android

[helloworld] Updating app metadata...
Setting main module... done

[helloworld] Building Android APK...
Starting a Gradle Daemon
...
BUILD SUCCESSFUL in 1m 1s
28 actionable tasks: 17 executed, 11 up-to-date
Building... done

[helloworld] Built build/helloworld/android/gradle/app/build/outputs/apk/debug/app-debug.apk
(beeware-venv) C:\...>briefcase build android

[helloworld] Updating app metadata...
Setting main module... done

[helloworld] Building Android APK...
Starting a Gradle Daemon
...
BUILD SUCCESSFUL in 1m 1s
28 actionable tasks: 17 executed, 11 up-to-date
Building... done

[helloworld] Built build\helloworld\android\gradle\app\build\outputs\apk\debug\app-debug.apk
Gradle 可能看起来卡住了
在 briefcase build android 步骤中,Gradle(Android 平台构建工具)会打印 CONFIGURING: 100%,似乎什么也没做。别担心,这不是卡住了,而是在下载更多的 Android SDK 组件。根据您的网络连接速度,这可能还需要 10 分钟(或更长时间)。只有在第一次运行 build 时才会出现这种滞后现象;这些工具已被缓存,下次构建时将使用缓存版本。
在虚拟设备上运行应用程序
现在我们可以运行应用程序了。您可以使用 Briefcase 的 run 命令在 Android 设备上运行应用程序。让我们从在 Android 模拟器上运行开始。
要运行应用程序,请运行 briefcase run android。运行时,系统会提示你可以在哪些设备上运行应用程序。最后一项总是创建新安卓模拟器的选项。
(beeware-venv) $ briefcase run android

Select device:

  1) Create a new Android emulator

>
(beeware-venv) $ briefcase run android

Select device:

  1) Create a new Android emulator

>
(beeware-venv) C:\...>briefcase run android

Select device:

  1) Create a new Android emulator

>
现在我们可以选择想要的设备。选择 “创建新的安卓模拟器 “选项,并接受默认的设备名称(”beePhone”)。
公文包 run 将自动启动虚拟设备。设备启动时,您将看到 Android 徽标:
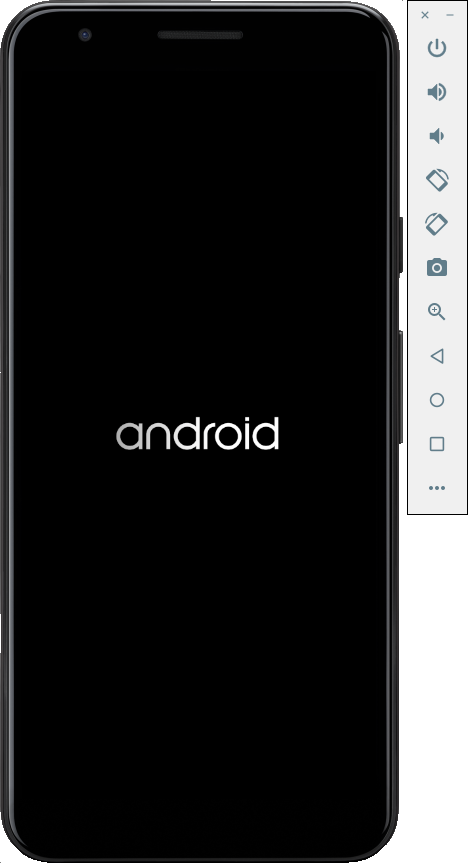
启动安卓虚拟设备
设备启动完成后,公文包将在设备上安装您的应用程序。您将短暂看到一个启动器屏幕:
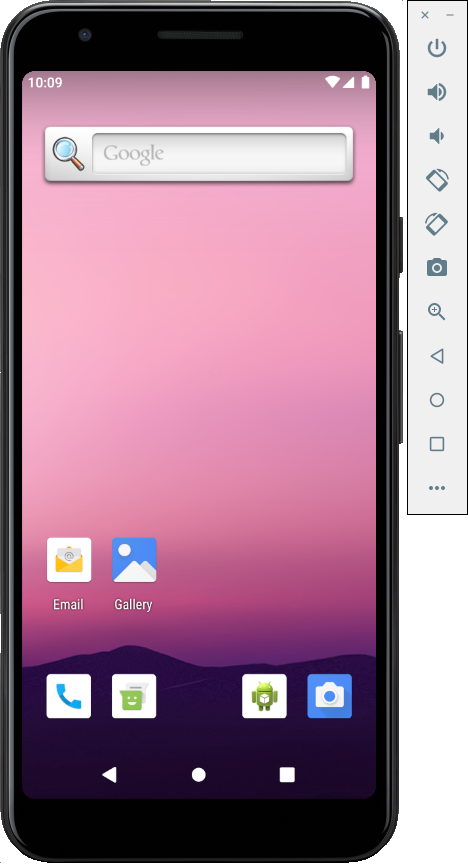
安卓虚拟设备已完全启动,显示在启动器屏幕上
然后应用程序就会启动。程序启动时,你会看到一个闪屏:

应用程序闪屏
模拟器没有启动!
安卓模拟器是一个复杂的软件,依赖于许多硬件和操作系统功能,这些功能在旧机器上可能无法使用或启用。如果在启动 Android 模拟器时遇到任何困难,请查阅 Android 开发人员文档中的 “要求和建议 <https://developer.android.com/studio/run/emulator#requirements>`__” 部分。
首次启动应用程序时,它需要将自己解压缩到设备上。这可能需要几秒钟。解压完成后,您将看到桌面应用程序的 Android 版本:
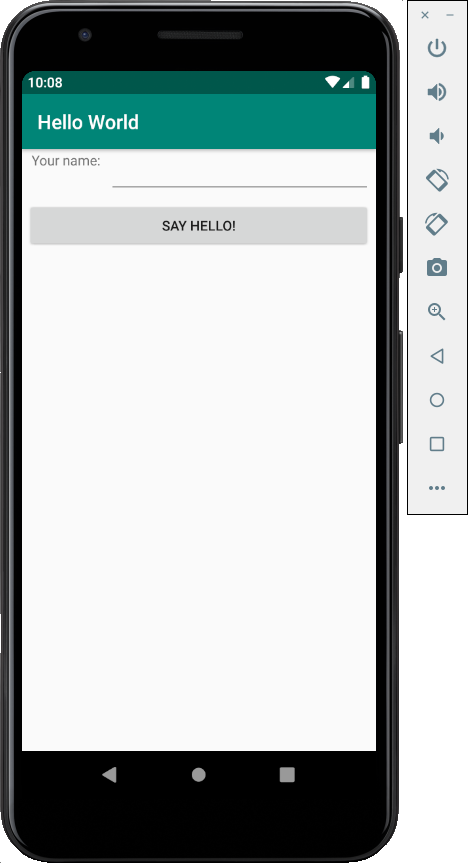
演示应用程序全面启动
如果看不到应用程序启动,可能需要检查运行 briefcase run 的终端,查看是否有错误信息。
今后,如果想在该设备上运行而不使用菜单,可以向 Briefcase 提供模拟器名称,使用 briefcase run android -d @beePhone 直接在虚拟设备上运行。
在实体设备上运行应用程序
如果您有实体安卓手机或平板电脑,可以用 USB 线缆将其连接到电脑,然后使用公文包来定位您的实体设备。
Android 要求您在设备用于开发前做好准备。您需要对设备上的选项进行两项更改:
启用开发人员选项
启用 USB 调试
有关如何进行这些更改的详细信息,请参阅 Android 开发人员文档 <https://developer.android.com/studio/debug/dev-options#enable>`__。
完成这些步骤后,在运行 briefcase run android 时,您的设备应出现在可用设备列表中。
(beeware-venv) $ briefcase run android

Select device:

  1) Pixel 3a (94ZZY0LNE8)
  2) @beePhone (emulator)
  3) Create a new Android emulator

>
(beeware-venv) $ briefcase run android

Select device:

  1) Pixel 3a (94ZZY0LNE8)
  2) @beePhone (emulator)
  3) Create a new Android emulator

>
(beeware-venv) C:\...>briefcase run android

Select device:

  1) Pixel 3a (94ZZY0LNE8)
  2) @beePhone (emulator)
  3) Create a new Android emulator

>
在这里,我们可以在部署列表中看到一个带有序列号的新物理设备–在本例中是 Pixel 3a。将来,如果你想不使用菜单而在该设备上运行,可以向 Briefcase 提供手机序列号(本例中为 briefcase run android -d 94ZZY0LNE8)。这将直接在设备上运行,无需提示。
我的设备没有出现!
如果你的设备根本没有出现在这个列表中,要么是你没有启用 USB 调试(要么是设备没有插上电源!)。
如果你的设备出现了,但却被列为 “未知设备(未授权开发)”,那么开发者模式尚未正确启用。重新运行 “启用开发者选项的步骤 <https://developer.android.com/studio/debug/dev-options#enable>`__”,并重新运行 “briefcase run android”。
下一步
我们现在已经在手机上安装了应用程序!还有其他地方可以部署 BeeWare 应用程序吗?请参考 Tutorial 6 了解更多…