Tutorial 7 - Die (Dritt)-Partei in Gang bringen
Bisher haben wir in der von uns erstellten Anwendung nur unseren eigenen Code sowie den von BeeWare bereitgestellten Code verwendet. In einer realen Anwendung werden Sie jedoch wahrscheinlich eine Bibliothek eines Drittanbieters verwenden wollen, die Sie aus dem Python Package Index (PyPI) herunterladen.
Ändern wir unsere Anwendung so, dass sie eine Bibliothek eines Drittanbieters enthält.
Zugriff auf eine API
Eine häufige Aufgabe, die eine Anwendung erfüllen muss, besteht darin, eine Anfrage an eine Web-API zu stellen, um Daten abzurufen und diese Daten dem Benutzer anzuzeigen. Da es sich hier um eine Spielzeuganwendung handelt, haben wir keine echte API, mit der wir arbeiten können, also verwenden wir die {JSON} Placeholder API als Datenquelle.
Die {JSON} Platzhalter-API verfügt über eine Reihe von „gefälschten“ API-Endpunkten, die Sie als Testdaten verwenden können. Einer dieser APIs ist der Endpunkt /posts/, der gefälschte Blog-Posts zurückgibt. Wenn Sie https://jsonplaceholder.typicode.com/posts/42 in Ihrem Browser öffnen, erhalten Sie einen JSON-Payload, der einen einzelnen Beitrag beschreibt - etwas Lorum ipsum Inhalt für einen Blogbeitrag mit der ID 42.
Die Python-Standardbibliothek enthält alle Werkzeuge, die Sie für den Zugriff auf eine API benötigen. Die eingebauten APIs sind jedoch sehr einfach. Sie sind gute Implementierungen des HTTP-Protokolls - aber sie erfordern, dass der Benutzer viele Details auf niedriger Ebene verwaltet, wie URL-Umleitung, Sitzungen, Authentifizierung und Nutzdatenkodierung. Als „normaler Browser-Benutzer“ sind Sie wahrscheinlich daran gewöhnt, diese Details als selbstverständlich anzusehen, da ein Browser diese Details für Sie verwaltet.
Infolgedessen haben Leute Bibliotheken von Drittanbietern entwickelt, die eingebauten APIs umhüllen und eine einfachere API bereitstellen, die der alltäglichen Browsererfahrung besser entspricht. Wir werden eine dieser Bibliotheken verwenden, um auf die {JSON} Platzhalter-API zuzugreifen - eine Bibliothek namens httpx.
Fügen wir einen httpx-API-Aufruf zu unserer Anwendung hinzu. Fügen Sie einen Import am Anfang der app.py hinzu, um httpx zu importieren:
import httpx
Dann modifizieren Sie den say_hello() Callback so, dass er wie folgt aussieht:
def say_hello(self, widget):
    with httpx.Client() as client:
        response = client.get("https://jsonplaceholder.typicode.com/posts/42")

    payload = response.json()

    self.main_window.info_dialog(
        greeting(self.name_input.value),
        payload["body"],
    )
Dies ändert den say_hello() Callback so, dass er, wenn er aufgerufen wird, dies tut:
eine GET-Anfrage an die JSON-Platzhalter-API stellen, um Beitrag 42 zu erhalten;
dekodiert die Antwort als JSON;
den Text der Nachricht zu extrahieren; und
den Text dieses Beitrags als Text des Dialogs einschließen.
Führen wir unsere aktualisierte Anwendung im Briefcase-Entwicklermodus aus, um zu prüfen, ob unsere Änderung funktioniert.
(beeware-venv) $ briefcase dev
Traceback (most recent call last):
File ".../venv/bin/briefcase", line 5, in <module>
    from briefcase.__main__ import main
File ".../venv/lib/python3.9/site-packages/briefcase/__main__.py", line 3, in <module>
    from .cmdline import parse_cmdline
File ".../venv/lib/python3.9/site-packages/briefcase/cmdline.py", line 6, in <module>
    from briefcase.commands import DevCommand, NewCommand, UpgradeCommand
File ".../venv/lib/python3.9/site-packages/briefcase/commands/__init__.py", line 1, in <module>
    from .build import BuildCommand  # noqa
File ".../venv/lib/python3.9/site-packages/briefcase/commands/build.py", line 5, in <module>
    from .base import BaseCommand, full_options
File ".../venv/lib/python3.9/site-packages/briefcase/commands/base.py", line 14, in <module>
    import httpx
ModuleNotFoundError: No module named 'httpx'
(beeware-venv) C:\...>briefcase dev
Traceback (most recent call last):
File "...\venv\bin\briefcase", line 5, in <module>
    from briefcase.__main__ import main
File "...\venv\lib\python3.9\site-packages\briefcase\__main__.py", line 3, in <module>
    from .cmdline import parse_cmdline
File "...\venv\lib\python3.9\site-packages\briefcase\cmdline.py", line 6, in <module>
    from briefcase.commands import DevCommand, NewCommand, UpgradeCommand
File "...\venv\lib\python3.9\site-packages\briefcase\commands\__init__.py", line 1, in <module>
    from .build import BuildCommand  # noqa
File "...\venv\lib\python3.9\site-packages\briefcase\commands\build.py", line 5, in <module>
    from .base import BaseCommand, full_options
File "...\venv\lib\python3.9\site-packages\briefcase\commands\base.py", line 14, in <module>
    import httpx
ModuleNotFoundError: No module named 'httpx'
Was ist passiert? Wir haben httpx zu unserem Code hinzugefügt, aber wir haben es nicht zu unserer virtuellen Entwicklungsumgebung hinzugefügt. Wir können dies beheben, indem wir httpx mit pip installieren und dann briefcase dev erneut ausführen:
(beeware-venv) $ python -m pip install httpx
(beeware-venv) $ briefcase dev
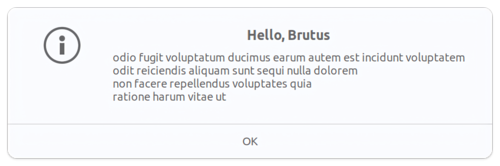
Wenn Sie einen Namen eingeben und auf die Schaltfläche drücken, sollte ein Dialogfeld angezeigt werden, das etwa so aussieht:

(beeware-venv) $ python -m pip install httpx
(beeware-venv) $ briefcase dev
Wenn Sie einen Namen eingeben und auf die Schaltfläche drücken, sollte ein Dialogfeld angezeigt werden, das etwa so aussieht:
(beeware-venv) C:\...>python -m pip install httpx
(beeware-venv) C:\...>briefcase dev
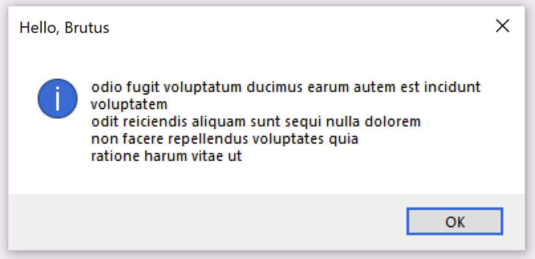
Wenn Sie einen Namen eingeben und auf die Schaltfläche drücken, sollte ein Dialogfeld angezeigt werden, das etwa so aussieht:
Wir haben jetzt eine funktionierende Anwendung, die eine Bibliothek eines Drittanbieters verwendet und im Entwicklungsmodus läuft!
Ausführen der aktualisierten Anwendung
Lassen Sie uns diesen aktualisierten Anwendungscode als eigenständige Anwendung verpacken. Da wir Änderungen am Code vorgenommen haben, müssen wir die gleichen Schritte wie in Tutorial 4 ausführen:
Aktualisieren Sie den Code in der gepackten Anwendung:
(beeware-venv) $ briefcase update

[helloworld] Updating application code...
...

[helloworld] Application updated.
Bauen Sie die Anwendung neu auf:
(beeware-venv) $ briefcase build

[helloworld] Adhoc signing app...
[helloworld] Built build/helloworld/macos/app/Hello World.app
Und schließlich führen Sie die Anwendung aus:
(beeware-venv) $ briefcase run

[helloworld] Starting app...
===========================================================================
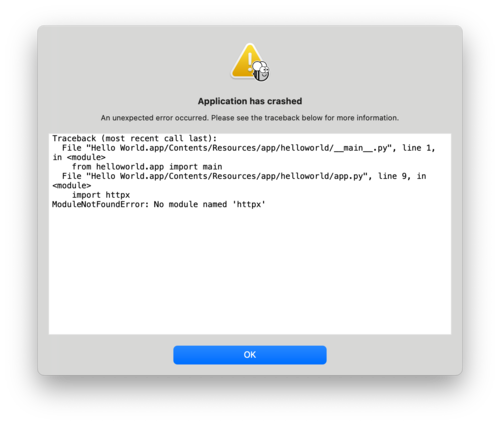
Wenn die Anwendung jedoch ausgeführt wird, wird in der Konsole ein Fehler und ein Absturzdialog angezeigt:
Aktualisieren Sie den Code in der gepackten Anwendung:
(beeware-venv) $ briefcase update

[helloworld] Updating application code...
...

[helloworld] Application updated.
Bauen Sie die Anwendung neu auf:
(beeware-venv) $ briefcase build

[helloworld] Finalizing application configuration...
...

[helloworld] Building application...
...

[helloworld] Built build/helloworld/linux/ubuntu/jammy/helloworld-0.0.1/usr/bin/helloworld
Und schließlich führen Sie die Anwendung aus:
(beeware-venv) $ briefcase run

[helloworld] Starting app...
===========================================================================
Wenn die Anwendung jedoch ausgeführt wird, wird in der Konsole ein Fehler angezeigt:
Traceback (most recent call last):
File "/usr/lib/python3.10/runpy.py", line 194, in _run_module_as_main
return _run_code(code, main_globals, None,
File "/usr/lib/python3.10/runpy.py", line 87, in _run_code
exec(code, run_globals)
File "/home/brutus/beeware-tutorial/helloworld/build/linux/ubuntu/jammy/helloworld-0.0.1/usr/app/hello_world/__main__.py", line 1, in <module>
from helloworld.app import main
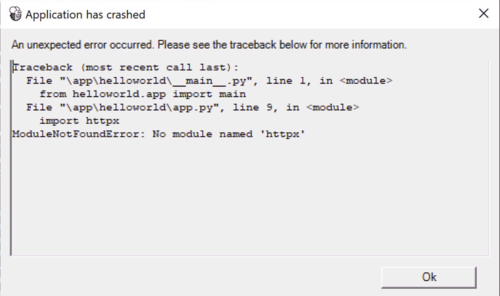
File "/home/brutus/beeware-tutorial/helloworld/build/linux/ubuntu/jammy/helloworld-0.0.1/usr/app/hello_world/app.py", line 8, in <module>
import httpx
ModuleNotFoundError: No module named 'httpx'
Unable to start app helloworld.
Aktualisieren Sie den Code in der gepackten Anwendung:
(beeware-venv) C:\...>briefcase update

[helloworld] Updating application code...
...

[helloworld] Application updated.
Bauen Sie die Anwendung neu auf:
(beeware-venv) C:\...>briefcase build
...

[helloworld] Built build\helloworld\windows\app\src\Toga Test.exe
Und schließlich führen Sie die Anwendung aus:
(beeware-venv) C:\...>briefcase run

[helloworld] Starting app...
===========================================================================
Wenn die Anwendung jedoch ausgeführt wird, wird in der Konsole ein Fehler und ein Absturzdialog angezeigt:
Wieder einmal ist der Start der Anwendung fehlgeschlagen, weil httpx installiert wurde - aber warum? Haben wir httpx nicht schon installiert?
Das haben wir - aber nur in der Entwicklungsumgebung. Ihre Entwicklungsumgebung befindet sich ausschließlich auf Ihrem Rechner - und wird nur aktiviert, wenn Sie sie explizit aktivieren. Obwohl Briefcase einen Entwicklungsmodus hat, ist der Hauptgrund für die Verwendung von Briefcase, Ihren Code zu verpacken, damit Sie ihn an jemand anderen weitergeben können.
Der einzige Weg, um zu garantieren, dass jemand anderes eine Python-Umgebung hat, die alles enthält, was er braucht, ist, eine vollständig isolierte Python-Umgebung zu erstellen. Das bedeutet, dass es eine komplett isolierte Python-Installation und einen komplett isolierten Satz von Abhängigkeiten gibt. Das ist es, was Briefcase baut, wenn Sie briefcase build ausführen - eine isolierte Python Umgebung. Das erklärt auch, warum httpx nicht installiert ist - es wurde in Ihrer Entwicklungsumgebung installiert, aber nicht in der gepackten Anwendung.
Wir müssen also Briefcase mitteilen, dass unsere Anwendung eine externe Abhängigkeit hat.
Aktualisieren von Abhängigkeiten
Im Hauptverzeichnis Ihrer Anwendung befindet sich eine Datei namens pyproject.toml. Diese Datei enthält alle Konfigurationsdetails der Anwendung, die Sie beim Ausführen von briefcase new angegeben haben.
pyproject.toml ist in Abschnitte unterteilt; einer der Abschnitte beschreibt die Einstellungen für Ihre Anwendung:
[tool.briefcase.app.helloworld]
formal_name = "Hello World"
description = "A Tutorial app"
long_description = """More details about the app should go here.
"""
sources = ["src/helloworld"]
requires = []
Die Option requires beschreibt die Abhängigkeiten unserer Anwendung. Es handelt sich um eine Liste von Strings, die Bibliotheken (und optional die Versionen) der Bibliotheken angeben, die Sie in Ihre Anwendung aufnehmen möchten.
Ändern Sie die Einstellung requires so, dass sie lautet:
requires = [
    "httpx",
]
Durch Hinzufügen dieser Einstellung teilen wir Briefcase mit: „Wenn du meine Anwendung baust, führe pip install httpx in das Anwendungsbündel ein“. Alles, was eine legale Eingabe für pip install wäre, kann hier verwendet werden - Sie könnten also angeben:
Eine bestimmte Bibliotheksversion (z.B.
"httpx==0.19.0");Eine Reihe von Bibliotheksversionen (z.B.
"httpx>=0.19");Ein Pfad zu einem Git-Repository (z. B.
"git+https://github.com/encode/httpx"); oderEin lokaler Dateipfad (Aber Achtung: Wenn Sie Ihren Code an jemand anderen weitergeben, existiert dieser Pfad wahrscheinlich nicht auf dessen Rechner!)
Weiter unten in pyproject.toml werden Sie andere Abschnitte bemerken, die vom Betriebssystem abhängig sind, wie [tool.briefcase.app.helloworld.macOS] und [tool.briefcase.app.helloworld.windows]. Diese Abschnitte haben auch eine requires Einstellung. Diese Einstellungen erlauben es Ihnen, zusätzliche plattformspezifische Abhängigkeiten zu definieren - wenn Sie also zum Beispiel eine plattformspezifische Bibliothek benötigen, um einen Aspekt Ihrer Anwendung zu behandeln, können Sie diese Bibliothek im plattformspezifischen requires-Abschnitt angeben, und diese Einstellung wird nur für diese Plattform verwendet. Sie werden feststellen, dass die toga-Bibliotheken alle im plattformspezifischen requires-Abschnitt angegeben sind - das liegt daran, dass die Bibliotheken, die für die Anzeige einer Benutzeroberfläche benötigt werden, plattformspezifisch sind.
In unserem Fall wollen wir, dass httpx auf allen Plattformen installiert wird, also verwenden wir die Einstellung requires auf Anwendungsebene. Die Abhängigkeiten auf Anwendungsebene werden immer installiert; die plattformspezifischen Abhängigkeiten werden zusätzlich zu den Abhängigkeiten auf Anwendungsebene installiert.
Einige Binärpakete sind möglicherweise nicht verfügbar
Auf Desktop-Plattformen (macOS, Windows, Linux) kann jede pip-Installation zu Ihren Anforderungen hinzugefügt werden. Auf mobilen und Web-Plattformen sind Ihre Möglichkeiten etwas eingeschränkt <https://briefcase.readthedocs.io/en/latest/background/faq.html#can-i-use-third-party-python-packages-in-my-app>`__.
Kurz gesagt: Jedes reine Python-Paket (d.h. Pakete, die kein binäres Modul enthalten) kann ohne Probleme verwendet werden. Wenn Ihre Abhängigkeit jedoch eine Binärkomponente enthält, muss diese kompiliert werden; derzeit bieten die meisten Python-Pakete keine Kompilierungsunterstützung für Nicht-Desktop-Plattformen.
BeeWare kann Binärdateien für einige beliebte Binärmodule (einschließlich numpy, pandas und cryptography) bereitstellen. Es ist normalerweise möglich, Pakete für mobile Plattformen zu kompilieren, aber es ist nicht einfach einzurichten - das würde den Rahmen eines einführenden Tutorials wie diesem sprengen.
Nun, da wir Briefcase über unsere zusätzlichen Anforderungen informiert haben, können wir versuchen, unsere Anwendung erneut zu paketieren. Vergewissern Sie sich, dass Sie Ihre Änderungen in pyproject.toml gespeichert haben, und aktualisieren Sie Ihre Anwendung erneut - dieses Mal mit dem Flag -r. Dadurch wird Briefcase angewiesen, die Anforderungen in der gepackten Anwendung zu aktualisieren:
(beeware-venv) $ briefcase update -r

[helloworld] Updating application code...
Installing src/hello_world...

[helloworld] Updating requirements...
Collecting httpx
  Using cached httpx-0.27.0-py3-none-any.whl.metadata (7.2 kB)
...
Installing collected packages: zipp, typing-extensions, travertino, sniffio, pycairo, idna, h11, exceptiongroup, certifi, pygobject, importlib-metadata, httpcore, anyio, toga-core, httpx, gbulb, toga-gtk
Successfully installed anyio-4.3.0 certifi-2024.2.2 exceptiongroup-1.2.1 gbulb-0.6.5 h11-0.14.0 httpcore-1.0.5 httpx-0.27.0 idna-3.7 importlib-metadata-7.1.0 pycairo-1.26.0 pygobject-3.48.2 sniffio-1.3.1 toga-core-0.4.4 toga-gtk-0.4.4 travertino-0.3.0 typing-extensions-4.11.0 zipp-3.18.1

[helloworld] Removing unneeded app content...
...

[helloworld] Application updated.
(beeware-venv) $ briefcase update -r

[helloworld] Finalizing application configuration...
Targeting ubuntu:jammy (Vendor base debian)
Determining glibc version... done
Targeting glibc 2.35
Targeting Python3.10

[helloworld] Updating application code...
Installing src/hello_world...

[helloworld] Updating requirements...
Collecting httpx
  Using cached httpx-0.27.0-py3-none-any.whl.metadata (7.2 kB)
        ...
Installing collected packages: zipp, typing-extensions, travertino, sniffio, pycairo, idna, h11, exceptiongroup, certifi, pygobject, importlib-metadata, httpcore, anyio, toga-core, httpx, gbulb, toga-gtk
Successfully installed anyio-4.3.0 certifi-2024.2.2 exceptiongroup-1.2.1 gbulb-0.6.5 h11-0.14.0 httpcore-1.0.5 httpx-0.27.0 idna-3.7 importlib-metadata-7.1.0 pycairo-1.26.0 pygobject-3.48.2 sniffio-1.3.1 toga-core-0.4.4 toga-gtk-0.4.4 travertino-0.3.0 typing-extensions-4.11.0 zipp-3.18.1

[helloworld] Removing unneeded app content...
...

[helloworld] Application updated.
(beeware-venv) C:\...>briefcase update -r

[helloworld] Updating application code...
Installing src/helloworld...

[helloworld] Updating requirements...
Collecting httpx
  Using cached httpx-0.27.0-py3-none-any.whl.metadata (7.2 kB)
        ...
Installing collected packages: zipp, typing-extensions, travertino, sniffio, pycairo, idna, h11, exceptiongroup, certifi, pygobject, importlib-metadata, httpcore, anyio, toga-core, httpx, gbulb, toga-gtk
Successfully installed anyio-4.3.0 certifi-2024.2.2 exceptiongroup-1.2.1 gbulb-0.6.5 h11-0.14.0 httpcore-1.0.5 httpx-0.27.0 idna-3.7 importlib-metadata-7.1.0 pycairo-1.26.0 pygobject-3.48.2 sniffio-1.3.1 toga-core-0.4.4 toga-gtk-0.4.4 travertino-0.3.0 typing-extensions-4.11.0 zipp-3.18.1

[helloworld] Removing unneeded app content...
...

[helloworld] Application updated.
Sobald Sie das Update durchgeführt haben, können Sie briefcase build und briefcase run ausführen - und Sie sollten Ihre gepackte Anwendung mit dem neuen Dialogverhalten sehen.
Bemerkung
Die Option -r zum Aktualisieren der Anforderungen wird auch von den Befehlen build und run beachtet. Wenn Sie also in einem Schritt aktualisieren, bauen und ausführen wollen, können Sie briefcase run -u -r verwenden.
Nächste Schritte
Wir haben jetzt eine App, die eine Bibliothek eines Drittanbieters verwendet! Vielleicht haben Sie jedoch bemerkt, dass die App beim Drücken der Taste nicht mehr richtig reagiert. Können wir etwas tun, um das zu beheben? Schau dir Tutorial 8 an, um das herauszufinden…